How Do I Use iCallBlazer?
![]()
How Do I Use iCallBlazer? |
|
● iCallBlazer Power Dialing Session: Select the Contacts that you want to call in the Contact Manager Search Results table. Just click the iCallBlazer link to start your dialing session.
● Phone Scripts: Select a phone script to use during your dialing session. You can add your own phone scripts if you want too.
● Follow Up Emails: Select a follow up email to send after a call. You can also set up follow up emails to be sent automatically for various call scenarios.
● Voicemails: Upload or record voicemails that can be left if the call is answered by an answering machine.
● Call History Report: Review your call history.
● Opt Out: The Federal Trade Commission's August 29, 2008, Final Amended Telemarketing Sales Rule ("TSR") requires that an Opt-Out toll free service be available so people you call can opt out from receiving calls in the future. When your Contact calls the toll free opt out number and enters his/her phone number, the phone number will be added to the iCallBlazer Do Not Call list and will not be included in future iCallBlazer call sessions.
● With the Live Person Call Session, iCallBlazer will hang up a call after the phone has rung unanswered (for the amount of seconds you set) and automatically move to the next call. Voicemails are not left during a Live Person Call Session.
● With the Automated Voicemail Call Session, you choose the action to take when a call is made. When you encounter an answering machine or voicemail, you can choose to leave a voicemail message.
1. On the back office Welcome page, click the Go to My User Settings link.
2. On the User Settings page, click the iCallBlazer Settings link. You will be prompted to select an iCallBlazer package. Once you select a package, you will proceed to the iCallBlazer Settings page.
3. On the iCallBlazer Settings page, click the iCallBlazer Automatic Email Settings link. iCallBlazer can send emails automatically based on your call result. Select the appropriate Follow Up Email from the drop-down for each call result.
4. If you plan to have an Automated Voicemail Call Session, click the iCallBlazer link in the Page Headline to return to the iCallBlazer Settings page, and then click the Voicemail link. Follow the instructions to add a voicemail. You need to have a voicemail saved to be able to start your Automated Voicemail call session.
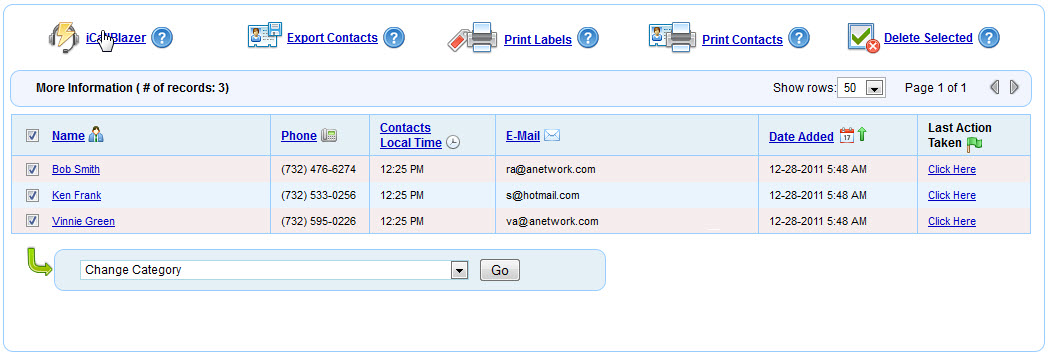
1. Click the My Contacts main menu button. On the Manage Contacts page, search for and then select the Contacts that you want to call in the Search Results table.
2. Click the iCallBlazer link to start your dialing session.
1. You will be prompted to select the type of call session you want to have, Live Person Call Session or Automated Voicemail Call Session. Make your call session type selection and click the Save button. The page will refresh.
● If you select the Live Person Call Session, iCallBlazer will hang up a call after the phone has rung unanswered (for the amount of seconds you set) and automatically move to the next call. Voicemails are not left during a Live Person Call Session. This is the setting to use if you are only looking to find people to speak with.
● If you select the Automated Voicemail Call Session, you choose the action to take when a call is made. When you encounter an answering machine or voicemail, you can choose to leave a voicemail message.
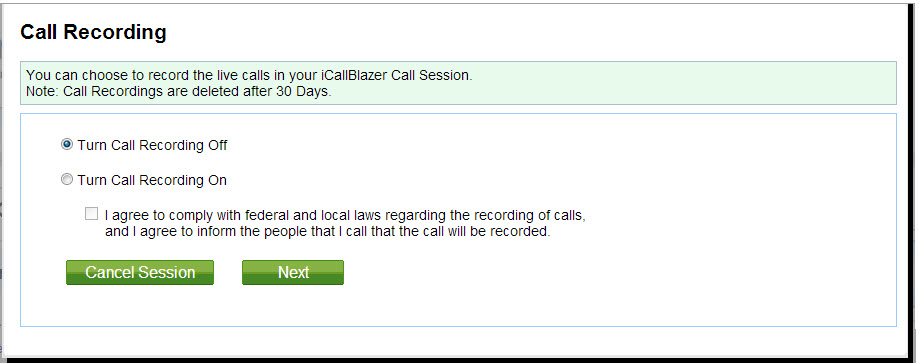
2. You can choose to record the live calls in your iCallBlazer Call Session. Note: Call Recordings are deleted after 30 Days.
3. Follow the directions in the window to connect to iCallBlazer using your phone. Enter your Member ID and Session ID when prompted.
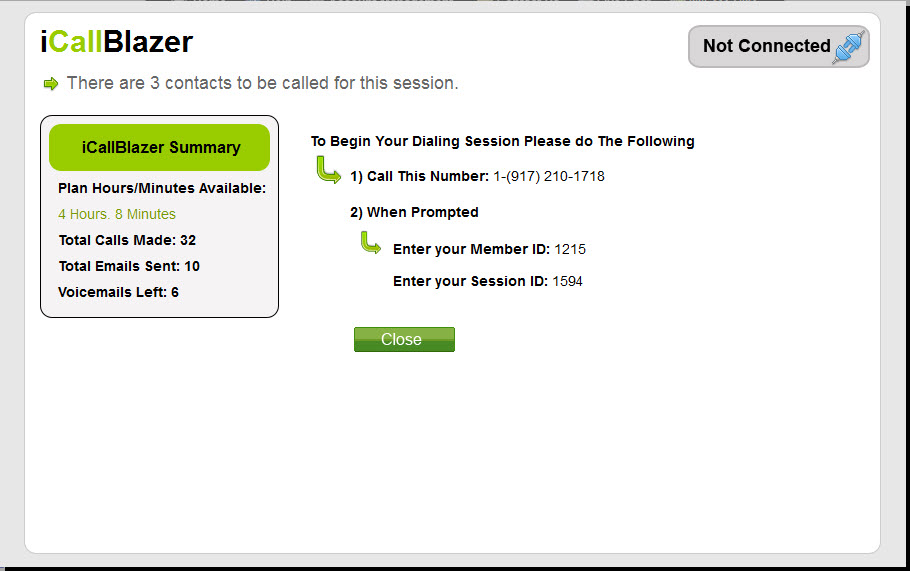
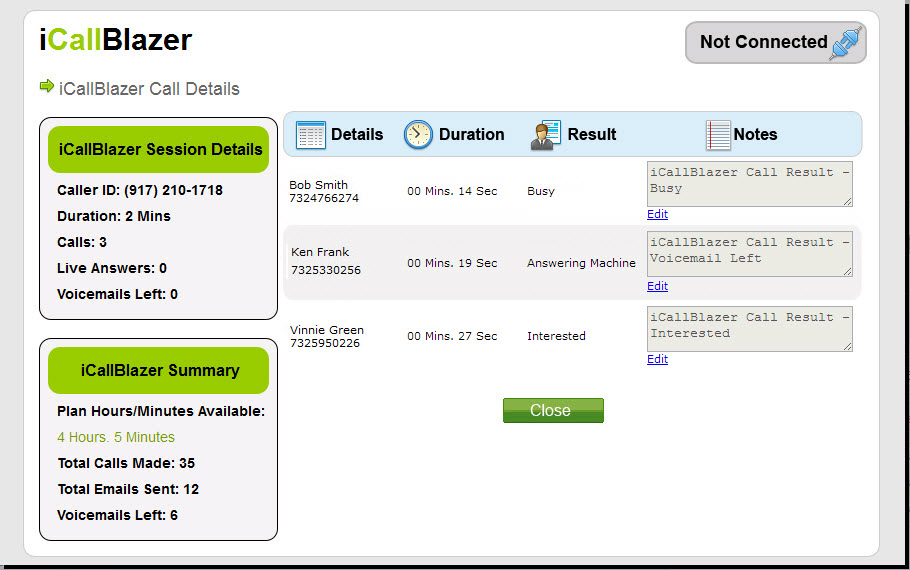
● The iCallBlazer Summary section on the left hand side of the screen displays:
● your available hours/minutes
● the total number of iCallBlazer calls you have made
● the number of follow up emails you have sent through iCallBlazer
● the number of voicemails you have left through iCallBlazer
After your Member ID and Session ID are entered on the phone, the window will refresh.
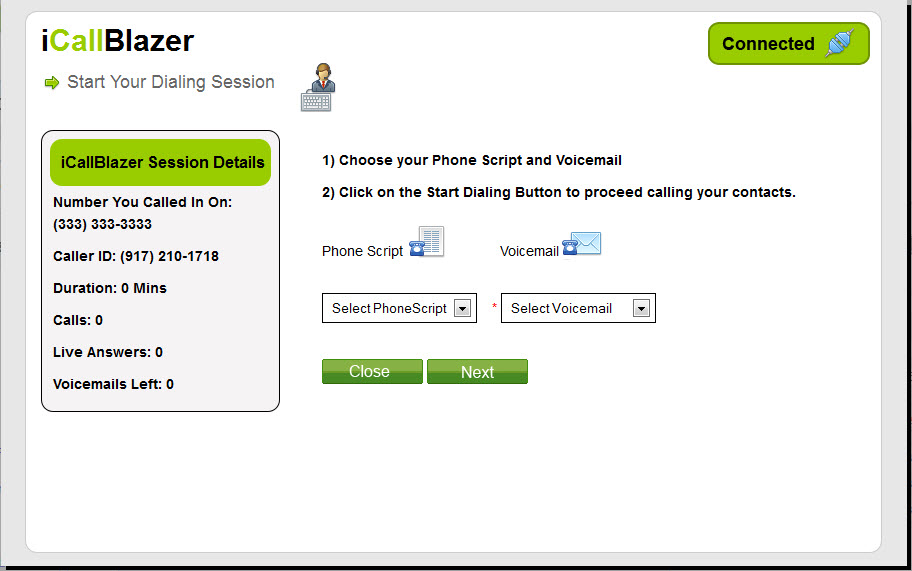
4. Select the Phone Script to view during the session. Select the Voicemail you would like to leave if you get an answering machine (if appropriate). Click the Next button and the window will refresh.
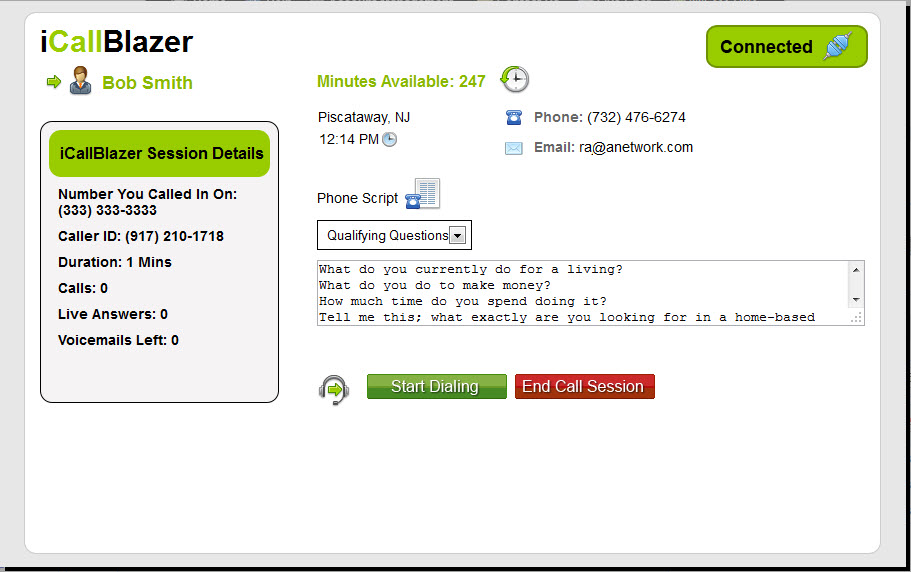
5. The top section on the screen shows the info for the contact you will call first. Click on Start Dialing button to begin calling your contacts.
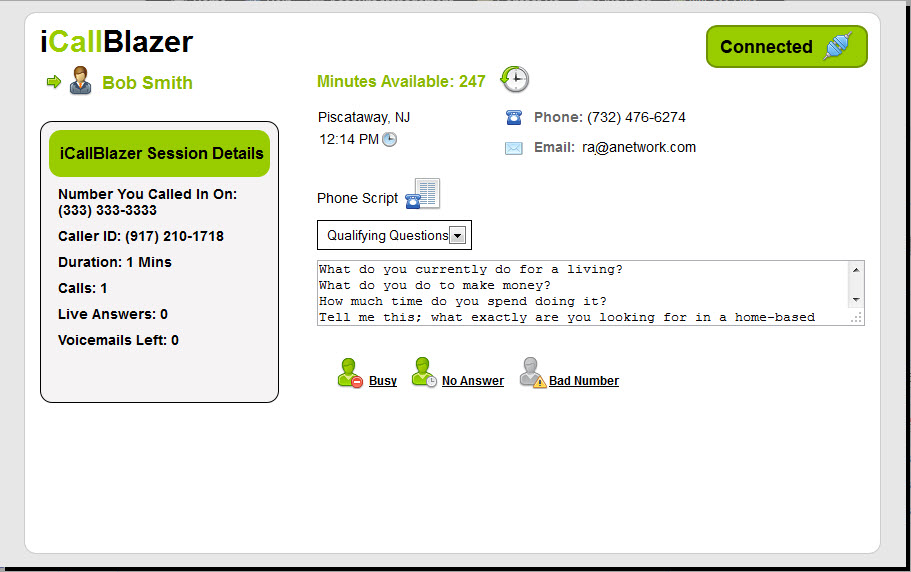
● Busy: Click this link if the number you are calling is busy to add a “Busy” note to the contact record and send the “Busy” follow up email (if you have automatic follow up emails set up for this call result).
● No Answer: Click this link if you get no answer to add a “No Answer” note to the contact record and send the “No Answer” follow up email (if you have automatic follow up emails set up for this call result).
● Bad Number: Click this link if the number you are calling is an invalid number to add a “Bad Phone Number” note to the contact record and send the “Bad Phone Number” follow up email (if you have automatic follow up emails set up for this call result).
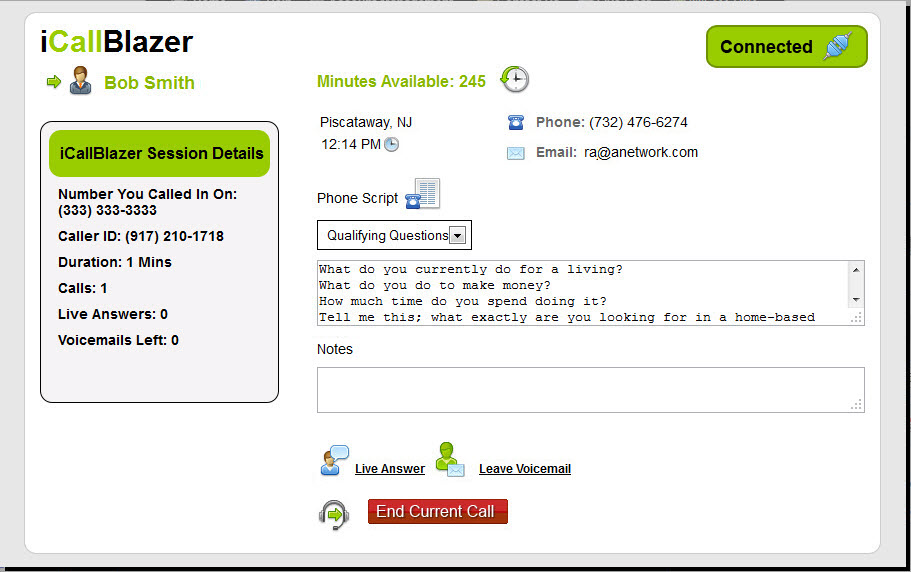
● Live Answer: If a person answers your call, click this link and the page will refresh with more options.
● Leave Voicemail: If the call is answered by an answering machine or voicemail, click this link and iCallBlazer will leave a voicemail as the window refreshes so you can start dialing the next call.
● End Current Call: Click this link to end the current call and move on to the next call.
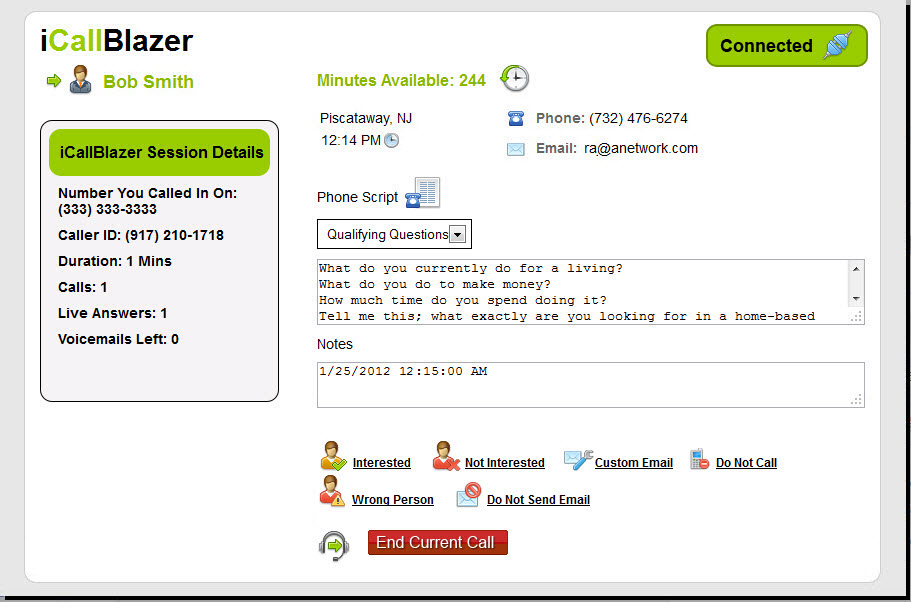
● Interested: If your prospect is interested, click this link to add an “Interested” note to the contact record and send the “Interested” follow up email (if you have automatic follow up emails set up for this call result).
● Not Interested: If your prospect is not interested, click this link to add a “Not Interested” note to the contact record and send the “Not Interested” follow up email (if you have automatic follow up emails set up for this call result).
● Wrong Person: If the contact is not the person who answered the phone, click this link to add a “Wrong Person” note to the contact record and send the “Wrong Person” follow up email (if you have automatic follow up emails set up for this call result).
● Custom Email: Click this link to send a custom email to the contact.
● Do Not Send Email: Click this link to skip sending an automatic follow up email to the contact when you end the current call (and move onto the next call).
● Do Not Call: Clicking this link adds the contact’s phone number to the Do Not Call list, so it will not be included in future iCallBlazer sessions.
● End Current Call: Click this link to end the current call and move on to the next call.